The complete guide · 2026 edition

Home theater setup: the complete guide

Nine steps, in the order that works: each one depends on the last. Tell us about your room and every number, diagram and pick on the page fits it.

Fit this guide to my room
The short answerThe general rules · your numbers below
The nine steps, one line each
  1. Plan the layout around the seats: screen on a wall without a window behind or opposite it.
  2. Size the screen so it fills 30–40° of your view: about 0.61–0.84 × your eye distance in inches.
  3. Mount it with the center near seated eye height, and never more than about 15° above it.
  4. Seat everyone facing it, heads at least about 1½ ft off the back wall.
  5. Place speakers by angle from your head: fronts at 22–30°, surrounds near 110°, all at ear height.
  6. Put the subwoofer where a crawl says the bass is smoothest; bigger budgets add a second (four in some top-tier plans), placed for your room in step 6.
  7. Treat the first reflections on the side walls; a rug and curtains do the rest.
  8. Connect through one hub, back to the TV over HDMI eARC.
  9. Calibrate: Filmmaker Mode for movies, room correction from your seat, crossovers at 80 Hz to start.
30–40°of your view filled by the screen
42″seated eye height, where the screen center starts (higher over a console: yours is in step 3)
≈110°5.1 surrounds, beside and just behind
80 Hzcrossover to start
Step 0 · your room

Tell us about your room

Every number and diagram below updates to fit it. Nothing leaves your browser.

Equipment budget: screen, sound and extras, before tax and installation
Plans never go over it; some rooms are complete for less.
Daylight on the screen wall
Blackout shades count as none.
Mostly for
Rows of seats
Seating
Where speakers can go
Your plan, so far
  1. 2Screen75″A Mini-LED TV
  2. 3Center height47″bottom edge 29″ up
  3. 4Behind you3 ft 8 into the back wall
  4. 5Speakers5.1.25 around you, 2 overhead + 2 subwoofers
  5. 6Subwoofers2smoother at each seat
  6. 7Panels to start2at the side-wall reflections
Your system Step-up 5.1.2about $4,889before tax
  • Screen $1,200
  • Speakers $1,396
  • Receiver $599
  • Subwoofers $678
  • Extras $1,016
Every item, priced from this year’s picks →
See your room in 3DOpens Room Studio with these measurements and a 75-inch screen

We assume eyes about 42 inches up when seated, a 20-inch TV console, and ears at about the same height as your eyes. Everything on the page updates as you change the room.

1
Step 1 of 9 · about 20 minutes

Plan the layout

Do this

  • Decide where the seats go first. The screen goes on the wall they face; everything else is measured from the main seat.
  • Keep windows out of the screen’s reflection path: not behind the seats and not directly opposite the screen if you can avoid it.
  • Pick the wall without doors and walkways crossing between the seats and the screen.
  • Measure three numbers and enter them above: the TV wall’s width, the room’s depth, and your eyes-to-screen distance.
16 ft14 ft9 ft 6 in to your eyes3 ft 8 in
The screen goes on the wall you face; your seat sets everything else. Eyes to screen (9 ft 6 in), about 10 inches of head, and the gap behind (3 ft 8 in) make up the room’s 14 ft. With 3 ft 8 in behind your head, bass and surrounds have room to work. Windows belong on the side walls ahead of the seats: not on the screen wall, and not level with or behind you.

A home theater is a set of geometric relationships with one point at the center: your head on the main seat. So the first decision is not a product, it is where people sit.

Example roomSee this step in 3D
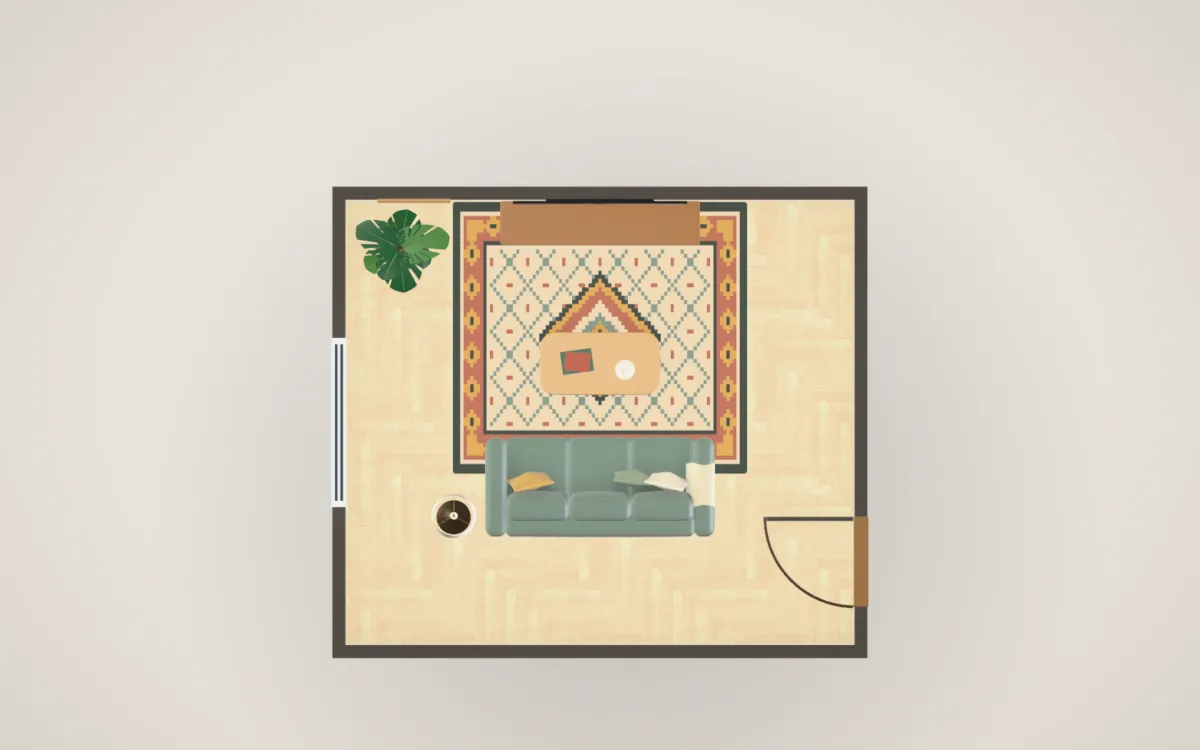
Plan view of a 16 by 14 foot living room: the TV wall, the sofa facing it, a window to one side and the door kept clear.

The example room from above: the screen on the long wall, the sofa facing it, a window on the side wall and the door kept clear.

Why the seats come first, and windows

The screen’s size is chosen from how far that head is from the screen; the speakers are placed by their angle from it; the subwoofer by how even the bass is there.

In a long room that usually means the seating faces down the room, with the screen on a short wall; in a squarer room (like our 16 × 14 ft example) either wall works, so pick the one that keeps windows out of the screen. A window on a side wall near the screen is fine; a window behind the seats puts its reflection on the screen in daytime, and one behind the screen puts the glare in your eyes. Our window and glare guide shows the mirror test that settles it in a minute.

Go deeper

Living room or dedicated room?

A dedicated room (often a basement) lets you control light completely, run wires in the walls, add rows and a riser, and use a projector. A living room has to share space, light and noise, which is why the plan above picks a brighter screen when you say the room has daylight, and why speaker placement matters more than speaker count there. Both use the same nine steps. See basement theaters, small rooms and open-plan rooms.

Sources for this step (2)
2
Step 2 of 9 · about 30 minutes

Choose the screen and its size

Do this

  • Size from distance: the screen should fill about 30–40° of your view. In inches, that’s about 0.61 to 0.84 times your eye distance in inches.
  • Choose the type by your room’s light: bright rooms favor a bright Mini-LED TV (or a matte, glare-free OLED when reflections, not brightness, are the problem), dim rooms reward OLED’s contrast, and past 100 inches a projector is the practical route.
  • Check the wall: a TV is about 0.87 times its diagonal wide; leave room either side for front speakers.
30–40° band75″ · 65.4″ wideyou9 ft 6 in32°of your view
75″ · Recommended
your 75″ screen’s edges, 32° apart tinted sizes fill 30–40° from your seat

A 75- to 85-inch screen fills 30–40° of your view from here; a 75-inch Mini-LED fills 32°. The 85-inch is worth saving for; your plan’s card lists what it buys first.

Thirty degrees is roughly where SMPTE’s reference viewing distance puts the screen’s edges; forty is THX’s cinema recommendation. Inside that band the picture feels big without your eyes having to travel.

Example roomSee this step in 3D
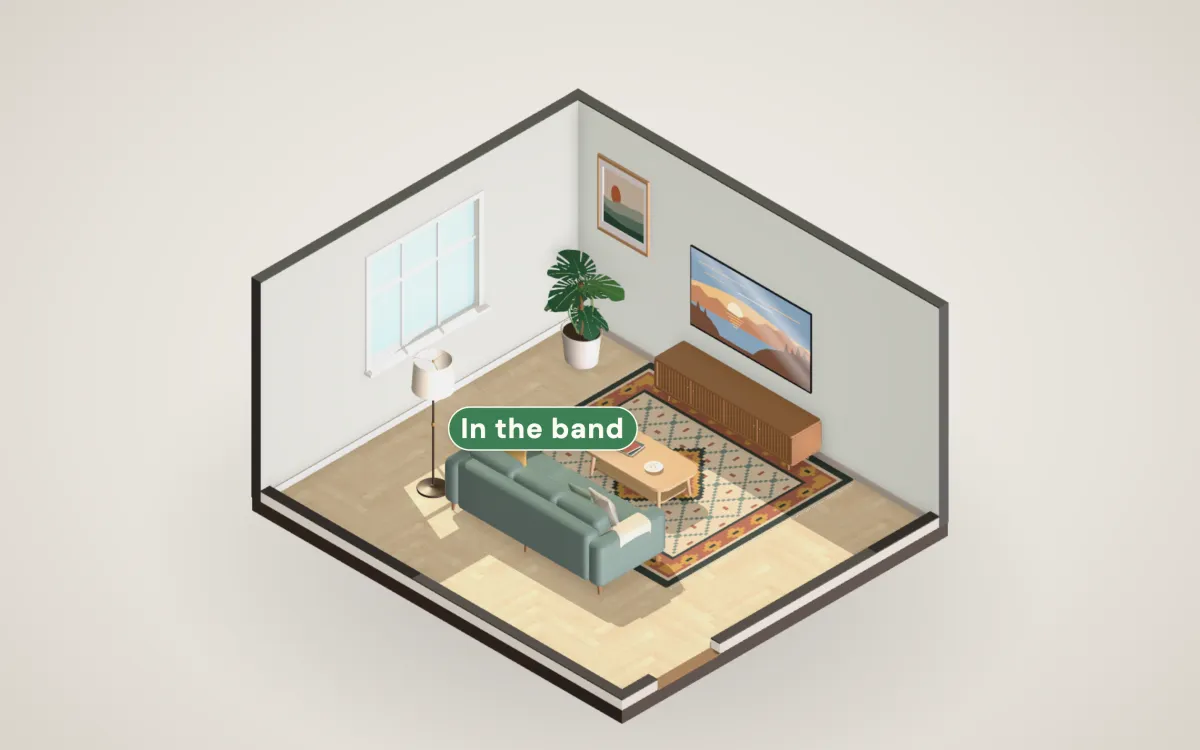
The same room with a 75-inch TV: the tag shows the screen filling the 30–40° band from the main seat.

The example room, one row: the tag shows the screen filling the 30–40° band from the main seat (two rows widen it to 45°). Your own numbers are in the drawing.

Why a 30–40° band (wider with two rows), and why size beats resolution

Under about 27° a screen starts to feel small; past about 61°, the limit for 4K video that CEDIA/CTA RP22 cites, you see the pixel structure and turn your head.

Resolution is a question of distance in picture heights. ITU-R BT.1845 puts 4K’s design distance at 1.6 picture heights (where all its detail is visible) and HD’s at 3.2, so 4K beats 1080p inside about 3.2 and 8K only helps closer than 1.6. A typical sofa is 2.5–3.5 picture heights from the screen, which is why size and picture quality, not 8K, are the things to spend on.

OLEDMini-LEDProjector
Blacks and contrast
Brightness in daylight
Side-seat picture
Size per dollar

Our editorial summary of each technology, informed by RTINGS’s test methods and makers’ specifications; not a measured ranking. Individual models vary, so check the picks.

Go deeper

TV or projector?

Up to about 100 inches a TV is simpler and brighter, and needs no screen. Past that, a projector is usually the only way to go bigger: our dark-room pick with a 120-inch screen was $2,229 on Oct 6, 2026, and our ultra-short-throw pick with its 110-inch light-rejecting screen $4,000. In a room with daylight, a projector needs that ultra-short-throw-and-ALR pairing; a standard white screen wants a dark room. Full comparison: projector vs TV and a projector in the living room.

Setting up a projector

Throw distance is the throw ratio times the picture’s width: a 120-inch 16:9 picture is 104.6 inches wide, so a 1.00–1.30 lens sits about 8 ft 9 in to 11 ft 4 in from the screen (BenQ, Epson’s distance tables). Check the exact model’s calculator before you drill. Use lens shift, not keystone: keystone correction reshapes the picture digitally and throws away resolution; lens shift moves it optically. Screen height: keep the bottom edge at about 28 inches or more so a center speaker fits under it and a second row can see over the first; the picture’s center then sits a few degrees above your eyes. Screens: gain brightens the center of the picture at the cost of the viewing cone (Stewart’s half-gain angle), and an ultra-short-throw projector needs a light-rejecting screen made for its steep angle (Screen Innovations). Mounting: into a ceiling joist or onto a solid shelf, with power brought there by an electrician (not an extension cord through the ceiling) and HDMI run before the ceiling is closed. Listen for the fan from the seats; a projector right above your head is the loudest place for it.

Sources for this step (21)
3
Step 3 of 9 · 1–2 hours

Place and mount it

Do this

  • Center the picture near seated eye height, about 42 inches on a typical sofa; higher only within about 15° of your eye line.
  • Mount into studs (or the masonry anchors the mount specifies) with a mount rated for the TV’s weight and VESA pattern.
  • On furniture, strap it: an anti-tip strap for the TV and the stand it sits on.
  • Plan the cables now: where power and HDMI and speaker wire will run before the TV goes up.
ceiling 8 ft 6 incenter speakerconsoleTHX 15° limit · 73″eyes 42″9 ft 6 in3°3° upfrom your eyes to the screen’s centercenter 47″
Eye level

The 75-inch’s bottom edge has to clear the center speaker on a 20-inch console, so its center sits at about 47 inches: 3° above your eyes, well inside THX’s 15°. A lower console, or the center speaker above the screen tilted down, brings it nearer eye level.

Manufacturers agree on the starting point: Sony puts the screen’s center at your eye level, and Samsung’s 42-inch figure is the eye height of a seated adult on a typical sofa. THX keeps the line of sight within 15° of the screen’s center.

Example roomSee this step in 3D
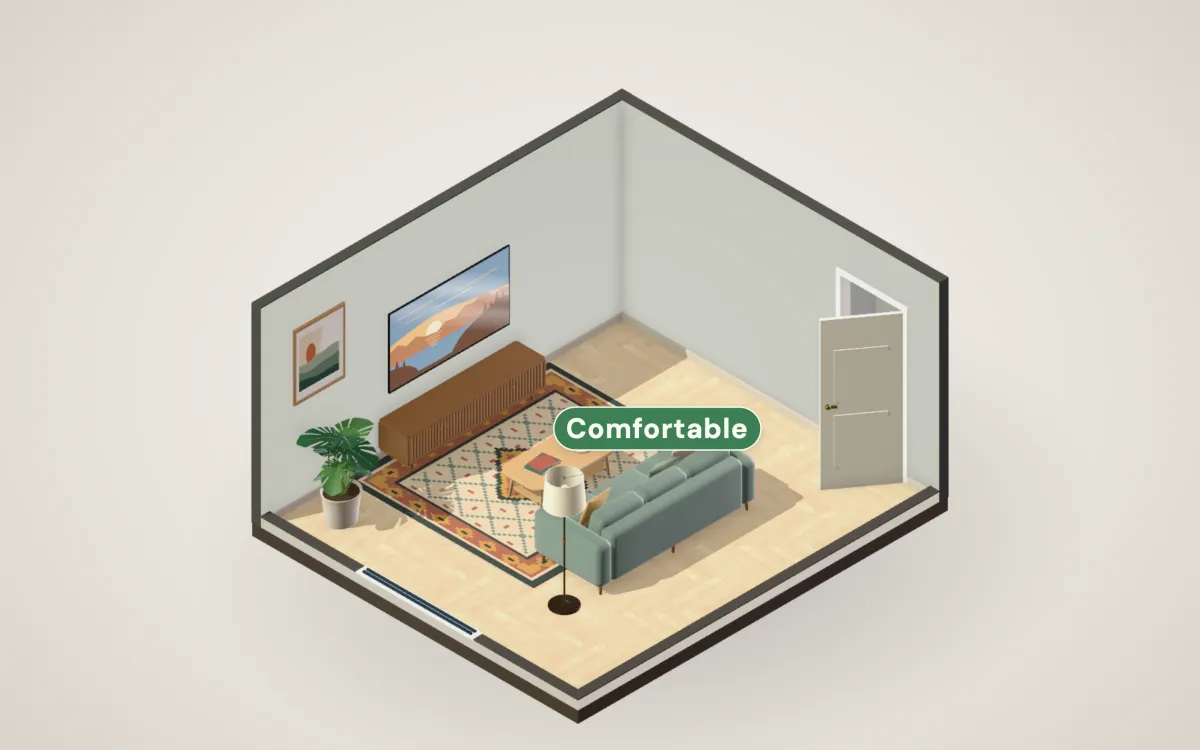
The TV mounted with its center near seated eye height, seen from the side: the tag shows a comfortable view from the main seat.

The example room from another corner: with the screen’s center near eye height, the tag shows a comfortable view from the main seat.

Why not higher, or over the fireplace

Above 15°, looking up gets tiring over a film, which is why the classic over-the-fireplace TV so often disappoints; our fireplace guide works through the angles and the heat limits.

Go deeper

What actually holds a TV on the wall

The VESA pattern (say 400 × 300 mm) is only the spacing of the holes on the back of the TV: it says nothing about the wall. What holds the TV is the wall’s structure and the fasteners the mount’s manual specifies for it.

Wood studs behind drywallLag bolts into the centers of the studs, as the mount specifies. The drywall is only the finish (SANUS).
Metal studsA mount and kit made for steel studs. SANUS’s kit requires the wall to hold five times the TV and mount, and advises against full-motion arms on steel studs.
Brick, block or concreteThe masonry anchors the mount specifies, in solid material, never in mortar joints (Peerless).
Drywall aloneNot for an ordinary mount. A few no-stud designs exist, each with its own weight and wall limits.

Keep three numbers apart. The rated load is the most the mount takes, accessories included: never exceed it. A UL-listed mount is tested to a multiple of it (Peerless quotes four times): that is a safety margin, not extra capacity. And the wall must carry several times the TV and mount (four to five times in the manuals we read). The safety standard for wall mounts is UL 2442. A TV on furniture needs anchoring too, for both the TV and the furniture (CPSC); the STURDY rule covers dressers, not TV consoles. Locate pipes and wires before drilling, and if the wall is uncertain, use the mount maker’s support or an installer. More: how high to mount a TV, Will it fit?

Sources for this step (11)
4
Step 4 of 9 · about 30 minutes

Seats, sightlines and comfort

Do this

  • Keep heads at least about 1½ ft (0.5 m) off the back wall, and let the notes under the drawing below check your seat for bass.
  • Keep side seats within about 35° of the screen’s center (an OLED tolerates more than most LCDs).
  • For a second row, raise it so the back row sees over front-row heads; choose two rows in step 0 and the drawing below sizes the riser for your room.
  • Leave recline room: 4 to 12 inches behind a recliner depending on the model (check its spec), and its fully reclined length in front.
35° limit12°outer seats 12° off center3 ft 8 in16 ft × 14 ft

Your outer seats sit about 12° off the screen’s center, well inside the 35° comfort limit; past about 20° many LCDs lose contrast, which is where an OLED’s wide viewing angle earns its keep. Your head is 3 ft 8 in from the back wall: enough to keep the surrounds off your ears. In our bass model your seat, 68% of the way back, isn’t in a dead spot with the subwoofers where the plan puts them; moving the sofa a foot either way wouldn’t gain much.

The main seat sets the geometry; the other seats inherit it. A seat pushed against the back wall is where rear surrounds would end up beside your ears, which is why CEDIA/CTA RP22 strongly advises against it. Its bass is heavier there, about 4 dB more in our study of 1,000 simulated rooms, and it was the most even of the positions we tested: heavy, not hollow. The geometry is the real reason to move.

Example roomSee this step in 3D
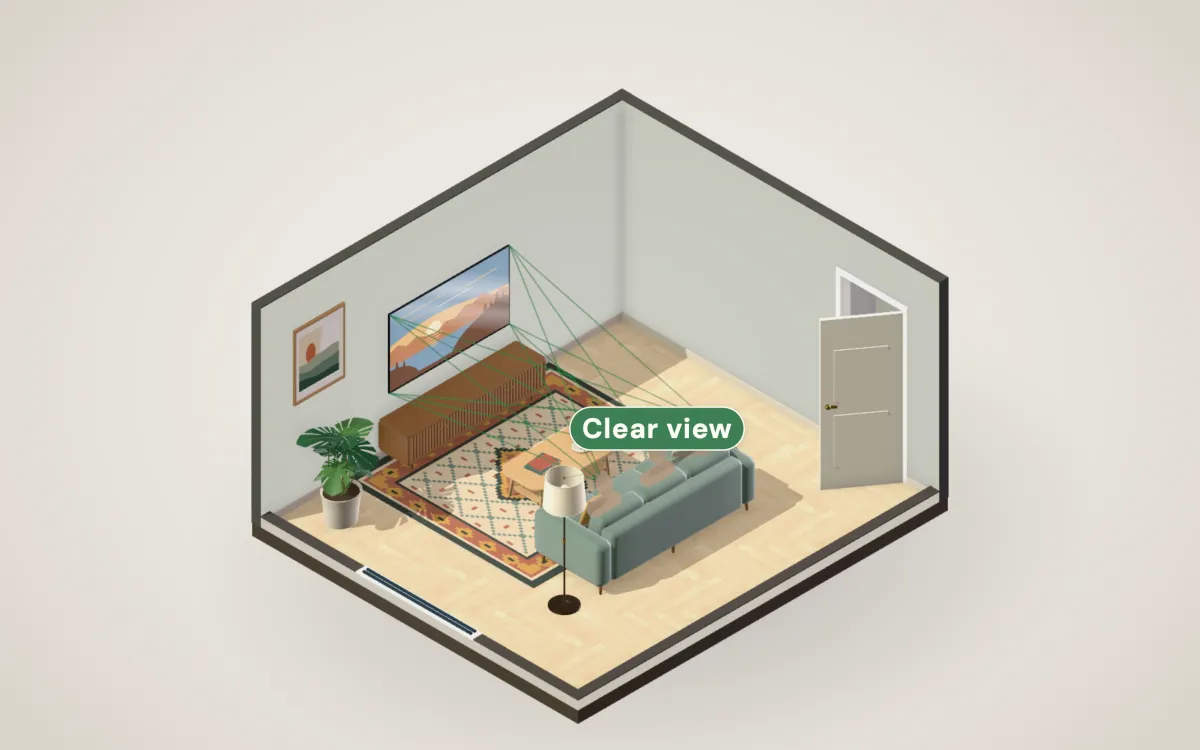
The example room from the side: the sofa 9.5 feet from the TV, with the sightline from each seat to the screen.

The example room: the main seat’s sightline to the screen is clear, with the sofa set back from the screen by the distance step 2 sets.

Why side seats have a limit, a riser, and the 38% rule

On bass: in our 1,000-room study, sitting about 38% of the room’s length from the front wall did better than average, while 38% from the back, with the sub at the front, was among the worst. The drawing above checks your own seat in the same kind of room model (ears at 42 inches, the broad bass slope set aside).

Off to the side, many LCD TVs lose contrast and color well before an OLED does (RTINGS measures this for every TV it tests), and the cinema-design handbook from UNIC puts the comfortable limit for side seats around 35°.

Two rows need a riser sized so the back row’s line to the bottom of the picture clears front-row heads: UNIC calls a clearance of 150–200 mm (6–8 in) above the front row’s eyes acceptable to good. Octane’s ready-made platforms are 7¾ or 14½ inches; a TV with a low bottom edge needs the taller one or more, and a higher screen less. Our riser calculator works through other row spacings.

Go deeper

Comfort that people forget

Comfort is part of the design: a seat you want to sit in for three hours, a room that doesn’t hum, and light you can control. Recliners lower your eyes by about 2–6 inches as they recline (UNIC), which lowers the ideal screen height a little. Keep a walkway clear of the seats and of the projector’s beam, and put the equipment’s fans and the HVAC return away from the main seat. See riser height and how far the couch should be.

Sources for this step (4)
5
Step 5 of 9 · 1–3 hours

Choose and place the speakers

Do this

  • Choose soundbar or receiver: with less than about $1,500 for sound, a good soundbar; from there, a receiver with five speakers and a subwoofer sounds better and grows with you. A one-box system like Samsung’s Q990F is the choice when wires or space rule speakers out.
  • Place by angle from your head: fronts 22–30° either side, the center at the screen aimed at your ears, 5.1 surrounds near 110° (on the side walls, 90–100°, if you sit against the back wall).
  • Keep them at seated ear height (about 40–42 inches; measure yours) and aimed at the main seat. With a back row on a riser, the surrounds can go higher than the fronts (Dolby allows up to 1.25 times their height): between the two rows’ ears, clear of the front row’s heads.
  • Put the fronts close to the wall behind them or well out from it, as the speaker’s manual suggests and with its port clearance, left and right at matching distances (the deep dive below explains the bass dip in between).
  • Add height with ceiling speakers where you can, up-firing modules where you can’t.
75″ screen26°26°110°110°LCRSLSRTMLTMRSubSub
  • speaker
  • subwoofer
  • in the ceiling: TML = top middle left
  • 16 ft × 14 ft, grid 1 ft
Two overheads slightly in front of you, roughly in line with the front left and right.
Fronts
8 ft 4 in apart, 3 ft 10 in from the side walls
Surrounds
on the side walls, 2 ft 8 in behind your ears
Heights
in line with the fronts, 11 in in front of your seat: nearly overhead. A bigger plan adds a second pair: if you’ll add it, cut this pair at the front spot instead, about 5 ft ahead of your ears (45° up), and set the receiver’s height speakers to Top Front; all four then line up without patching

Why 5.1.2 in your plan: Two height speakers add the overhead layer to a 5.1; at this budget that beats more speakers at ear level.

The angles come from Dolby’s layouts and the ITU’s 5.1 standard; about 110° for the surrounds sits inside all of them.

Example roomSee this step in 3D
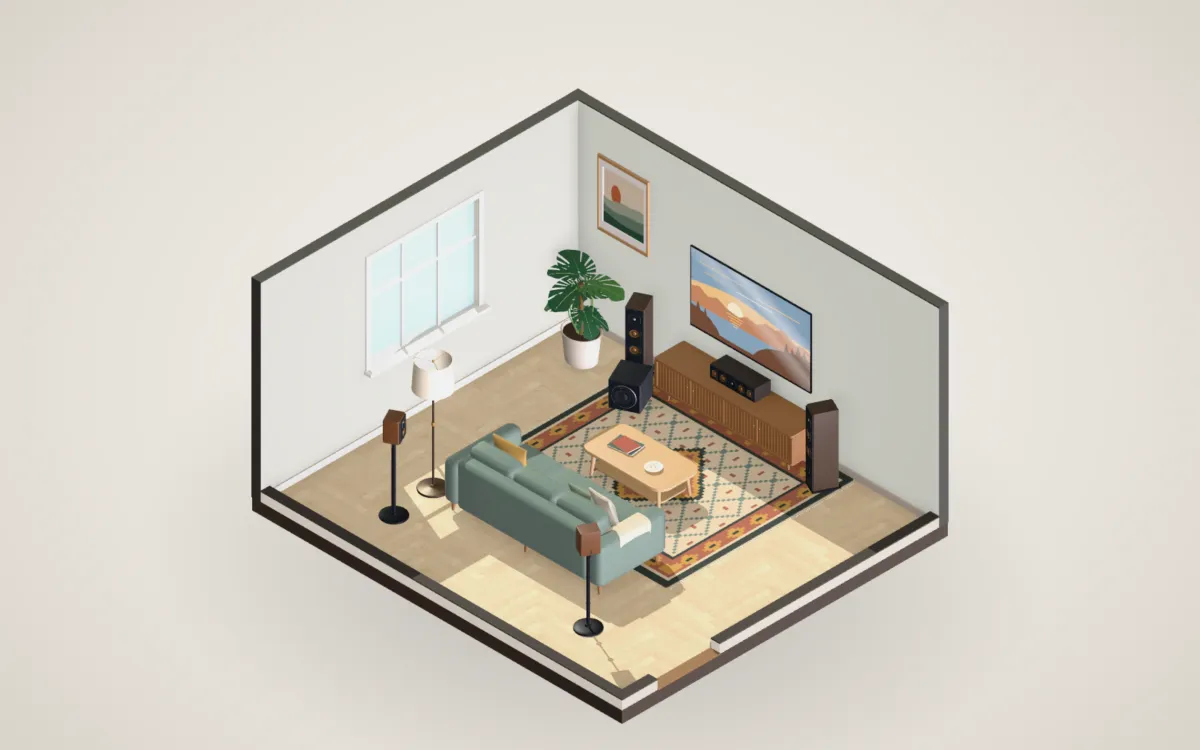
The room with 5.1 speakers: left, center and right by the TV, two surrounds beside and just behind the sofa, and a subwoofer.

The example room’s 5.1: left, center and right by the screen, surrounds beside and just behind the sofa. Your layout is in the drawing.

Why 110°, and where 7.1 differs

The references differ a little on surrounds: Dolby’s 2018 installation guide draws 90–110°, its current setup sheets 110–120°, and ITU-R BS.775 says 100–120°. In 7.1 the side surrounds move forward to 90–110° and the rears go behind you at 135–150°. If the seating is against the back wall, keep 5.1 with the surrounds on the side walls, level with you or a little behind: RP22 recommends side surrounds only there.

The center speaker and soundbar gaps

The center speaker carries most of the dialogue, so it goes directly above or below the screen, as close to it as possible, tilted toward your ears; on a shelf, pull it forward so its front is flush with the edge (SVS). Most centers lie on their side with a woofer either side of the tweeter, a layout that narrows coverage sideways, so dialogue can thin out at the end seats; listen from there before you settle on one. Only one of our center picks has an independent measurement (KEF’s R6 Meta, a forum member’s on Audio Science Review, not a full lab review), so the same check applies to the rest. A soundbar needs its own gap under a wall-mounted TV: Samsung asks 2 inches for the Q990F, Bose 4 for the Lifestyle Ultra, Sony 120–200 mm for the Bar 9/8. With an ultra-short-throw projector on the console, keep the center below the bottom of the picture and clear of the projector’s beam and vents; above the screen, tilted down, is the fallback (XGIMI). Behind the screen only if its maker says the screen is acoustically transparent: light-rejecting UST screens usually aren’t.

Go deeper

Atmos, ceiling speakers and up-firing modules

Overhead speakers in the ceiling go at about 45° in front of and behind the seat (Dolby allows 30–55°), lined up with the front left and right; a single pair (x.x.2) goes nearly overhead at about 80°. Up-firing “Atmos enabled” modules bounce sound off the ceiling instead, which Dolby says needs a flat, hard, reflective ceiling between 7½ and 14 feet high (ideally 7½–12 ft). Dolby also places the modules at or a little above seated ear height, no higher than half the wall’s height, and at least 3 ft from anyone listening (ideally 5 ft or more). A soundbar’s up-firing drivers need the same clear bounce path; some bars only simulate height. Full layouts: 5.1, 7.1, Dolby Atmos, the center speaker and soundbars.

Distance from the wall, toe-in and amplifier power
6 in (15 cm)on-wall≈570 Hz
12 in (30 cm)back to the wall≈290 Hz
24 in (60 cm)≈140 Hz
34 in (86 cm)≈100 Hz
3.6 ft (1.1 m)≈80 Hz
4.9 ft (1.5 m)≈60 Hz
First dip by distance from the wall behind the speaker to its front baffle, where the woofer is (log scale). The cabinet’s depth counts: a bookshelf speaker with its back to the wall is already about a foot out. Left of the dashed 80 Hz line the subwoofer is doing the work.

The wall behind the speaker. Sound from the back of the cabinet reflects off the wall and cancels the direct sound where it arrives half a wavelength late: the first dip falls at about the speed of sound ÷ (4 × the distance from the wall to the woofer). Genelec’s example: 86 cm from the wall, a dip near 100 Hz.

EQ can’t fill it, because it changes the direct and reflected sound together. Genelec’s remedies are placement: flush in the wall, or very close to it, which pushes the dip up where it does less harm. For a speaker crossed over at 80 Hz, close means the woofer within about a foot of the wall (the dip lands near 280 Hz and up); 1½–3 ft is the worst spot, putting it at about 95–190 Hz, right where the speaker takes over from the sub (Genelec’s under-2-ft figure is for its own monitors). Moving far out and treating the wall behind are its other options, best checked by measuring. Close up, tame the extra bass with the speaker’s wall setting or room correction. Keep left and right at matching distances.

  • Toe-in. Aim at the main seat to start, then adjust by ear. KEF starts its coaxial speakers at 0° and adjusts in steps of about 2°; unequal side walls can justify unequal angles.
  • Stands or wall mounts sound the same if they put the speaker in the same place: choose the one that gets the tweeter to ear height.
  • Power: read sensitivity’s basis (KEF’s R11 Meta: 90 dB at 2.83 V and 1 m, which at its 4 Ω nominal impedance is about 2 W) and the minimum impedance (3.2 Ω), and check the receiver is rated for that load. Watts alone don’t predict how loud a system plays at your seat.
Sources for this step (16)
6
Step 6 of 9 · about 30 minutes

Place the subwoofer

Your two subwoofers: at the middle of the front and back walls.

ReceiverSpeakers at an 80 Hz crossover (their bass below 80 Hz goes to the subs); the LFE low-pass, for the movie’s .1 effects channel, left at its default, often 120 Hz.
SubsThe S770H sends both subs one signal (Denon doesn’t document separate adjustment): set the subs’ own knobs by measuring at your seats (our model: Sub 1’s phase about 105° past Sub 2’s, Sub 2 down 6 dB), then run Audyssey. When its setup asks for the sub volume at about 10 o’clock, set the louder sub there, turn the other down until your measurement shows the same gap again, and leave both phase knobs as you set them.

Do this

  • Do a subwoofer crawl: sub on your seat, play a bass-heavy track, move around the floor where the sub could go, and listen for where the bass is most even.
  • Put the sub there, then run room correction.
  • For several seats, two subwoofers even out the bass better than one: start where your plan puts them, above, and confirm by measuring.

Where your two subwoofers go: near Harman’s first choice. Color: Sub 2 at each spot against where the plan puts it, with Sub 1 where it is.

TV wallTV cabinetSub 1Sub 2≈4≈4≈416 ft × 14 ft
≈4 vs ≈5 dBuneven at the average seat: two subs, levels set vs one
under 1 dBseat to seat, with one sub or two: your seats already match
up to 3½ dBmore output than one sub at this setting (Sub 2 down 6 dB) where the two arrive in step, less where they don’t: headroom for loud scenes

Lower is smoother.

Your two subs go at the middle of the front and back walls, the layout Todd Welti’s research at Harman ranks first for evening out several seats (Welti’s subs stand against the walls; our front one stands just in front of the cabinet). In our model your seats stay within a decibel of each other either way; the pair’s gain is evenness at every seat (≈4 against ≈5 dB with one sub).

The front one sits in front of the TV cabinet’s middle: a cabinet with an open center bay, or one split either side, keeps its doors and vents usable. If the cabinet’s front has to stay clear, the best layout against the walls is a pair in diagonally opposite corners, about 2 dB less even in our model.

How to read this map

Color compares each spot with the plan: the bass across your seats with the second sub there instead, the first where the plan puts it. Within half a decibel, our model’s noise, counts as the same. The main seat is in gold; each seat’s tag is how uneven its bass is with your two subs. The numbers assume the subs’ own volume and phase knobs are set by measuring (the settings are at the top of this step); a receiver that delays each sub separately gets more from the pair. “Uneven” is how much the bass level swings from note to note between 25 and 120 Hz (a standard deviation, in dB), leaving out the broad slope that the sub’s level, the crossover and room correction even out. It is a simplified, closed, rectangular room: use it to pick spots to try, then confirm with the crawl.

Below about 200 Hz the room’s dimensions decide where bass piles up and where it cancels, so where the sub stands matters more than any setting or panel. Corners give the most output; the crawl finds the most even spot by ear in a few minutes.

Example roomSee this step in 3D
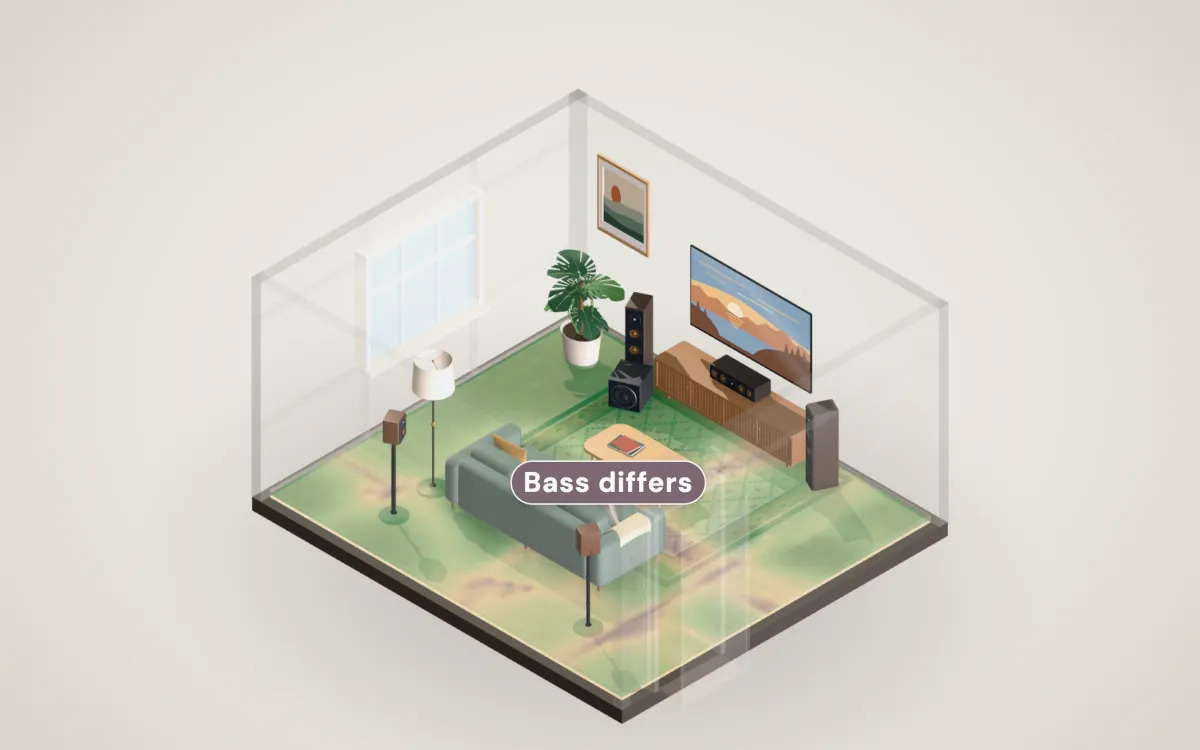
Bass map of the room: green where a subwoofer gives even bass at the sofa, mauve where it booms or cancels.

The example room with its sub in a front corner, the usual default: the tag marks the side seat whose bass differs most from the main seat’s. Your own map, beside the step, shows better spots.

Why two subwoofers, and where
Bass in our study of 1,000 simulated rooms, averaged (the study’s own measure, not the map’s score): lower is more even
SubwoofersSeat to seatAt each seat
One, in a corner4.5 dB7.3 dB
One, at the middle of the front wall3.7 dB7.9 dB
Two, on opposite walls3.1 dB7.4 dB

Two subs cut the difference from seat to seat by a fifth to a third, in line with Harman’s finding that two well-placed subs do most of what four can. Harman’s real-room tests (Welti and Devantier, 2006) show setup matters as much: in one room the seat-to-seat variation fell from 33.4 dB² with a corner sub to 23.7 with two at the wall midpoints, 14.3 at the best two spots and 8.0 with the pair’s settings optimized. So our model scores two subs as they can be set up.

How the plan decides. It walks Welti’s ranking (front and back walls, diagonal corners, the front wall’s quarter points, the front corners) and draws the first layout that fits your room, leaves a walkway and is at least as even as one well-placed sub in our model (counting a front sub that stands in front of the cabinet as about 1 dB worse, the cost of blocking it); a later one wins only if our model rates it at least 1.5 dB more even, and our model’s own pick shows dashed. If none qualifies, the two stand side by side for headroom. On the top tier it buys two HSU VTF-TN1s, the research’s pick, wherever a layout keeps the cabinet clear and scores within 1.5 dB of the 10E pair, averaged over small changes to the room and the seats (our model can’t tell smaller gaps apart); otherwise four 10Es, one per corner, which Welti found nearly as good as his best four-sub layout; where neither qualifies, the 10E pair stays.

Go deeper

Tuning two subwoofers by hand

The order depends on the receiver. On the nine-channel receiver, run Audyssey first with both subs connected, tune by hand, and don’t re-run it afterwards: it resets the distances you set. On the seven-channel receiver, set the subs’ own knobs first (items 1 and 3 below), then run Audyssey last. Its setup asks for the sub volume at about 10 o’clock: set the louder sub there, turn the other down until the measurement shows the same gap again, and leave both phase knobs as you set them.

  1. With the measurement mic and the free REW software, measure each sub on its own at the main seat and at two to five seats around it, 20–200 Hz.
  2. Nine-channel: set both subs’ distances equal, then delay one by lengthening the other’s distance (about 1.1 ft per millisecond) in 1–2 ms steps up to about 15 ms, also trying its level 3 dB up or 3–6 dB down and its polarity. Keep the setting where the seats’ curves look most alike; the free Multi-Sub Optimizer (MSO) can search this for you.
  3. Seven-channel: turn one sub’s phase knob in steps of about 30° (the 10E’s runs from 0 to 180°), then try Sub 2’s volume 3 to 6 dB down, measuring every seat each time. If you won’t measure, set both knobs alike (phase 0, the same volume) and let Audyssey set the pair: you keep the extra output and give up some of the evenness.
  4. Check the handover last: at the main seat, measure the speakers and subs together and look for a dip around 80 Hz; nudge the sub distance or flip its phase if there is one.
  5. On the nine-channel receiver, re-measure in REW after any change rather than re-running the calibration; on the seven-channel one, re-run Audyssey after changing a knob. Dirac’s Bass Control, in the bigger plans, does this search for you.
Crossover, distance, sizing and apartments

Set the speakers to an 80 Hz crossover (the THX starting point), leave the LFE low-pass at its default (often 120 Hz), and let room correction set the sub’s distance and level (a distance longer than your tape measure is the sub’s processing delay, not an error). In an apartment, keep the sub off shared walls and floors and close to the seat. Size by measured output, not driver size: a large or open-plan room needs several decibels more clean output at 20–31.5 Hz (the CEA-2010 figures in our picks), or a second sub; the phase check is under step 8. Try spots in your own room with the subwoofer simulator; the full method is in subwoofer placement.

Sources for this step (8)
7
Step 7 of 9 · an afternoon

Tame the room

Do this

  • Start soft: a large rug between the seats and the screen, heavy curtains with plenty of fullness, upholstered seating.
  • Find the side-wall first reflections with the mirror trick (or the diagram below) and put a panel on each, at ear height.
  • Go thick: thickness, more than foam versus fiber, sets how low a panel absorbs; GIK recommends 4 inches or more for music and films (2 inches for speech). The plans price its 4-inch panel ($139) once the screen has reached the top of its band and the budget reaches it, and its FlexRange panel (formerly the 242; GIK’s test report is for a 2-inch build) where the budget is tight.
  • Treat, don’t soundproof: panels change how the room sounds, not what the neighbors hear (that’s below).
3 ft 9 in6 ft 3 in16 ft × 14 ftLR
On each side wall, center a panel between 3 ft 9 in and 6 ft 3 in from the TV wall, at seated ear height (about 3 ft 6 in). One 2 × 4 ft panel per wall, hung long side along the wall, covers both points and the spread from a three-seat sofa. Next, the plans add panels on the ceiling between you and the speakers; if the wall behind your seats is close and hard, it’s worth a pair too.

Sound reaches you directly, then a few milliseconds later off the nearest surfaces. The floor bounce usually comes first (a rug tames its treble); the side-wall reflections are the strongest from the sides, and for film we’d treat them: they blur dialogue and pull the center image toward the walls.

Example roomSee this step in 3D
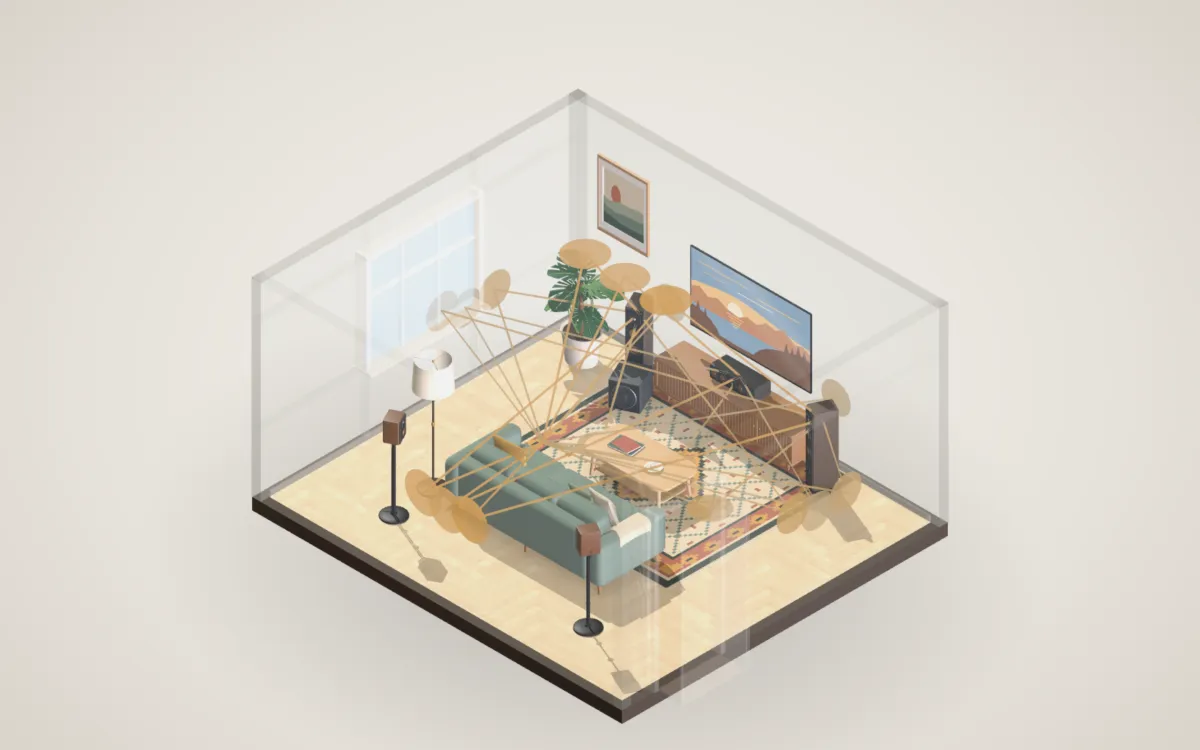
Sound paths from the front speakers bouncing off the side walls to the sofa: the spots to treat first.

The example room’s first reflections: sound from each front speaker bounces off the side walls to the sofa. Those spots get treated first.

Why treat them, and how much in all

It is a choice rather than a law: Floyd Toole’s research found many listeners like some side reflections for music, and a diffuser keeps the energy while breaking up the echo. Beyond those spots, Primacoustic starts at 15–25% of the wall area for living spaces and 25% or more for a dedicated theater; a rug, curtains and upholstered furniture count toward it. Bass needs thick traps in the corners, but placement (step 6) fixes more.

Go deeper

How much, and in what order

Order matters: furnish, then a rug, curtains, the first-reflection panels, then the wall behind the seats if it is close and hard, then bass traps. With in-ceiling heights, the ceiling between you and the speakers can take a pair too (the top plans buy one); with up-firing heights, leave that ceiling bare, since they bounce off it. Where a sub stands in a corner, hang that corner’s trap above it. Measure or listen between steps; most living rooms are done after the first three. Details: where to put panels, how many, rugs and curtains, bass traps, and the panel finder.

Neighbors and noise

Acoustic panels don’t stop sound leaving the room. Keeping it in takes construction: mass, airtight seams and decoupled walls, and bass is the hardest part (single-number ratings like STC barely describe it; ASTM E413). Without building work, the steps that help most: seal the door with gaskets and a door bottom, keep the subwoofer away from shared walls and corners (KEF; isolation feet change transmission by about a decibel or less), sit closer to the sub so it needs less output, and use night mode or dynamic volume for late films. Bass carries furthest, so turning the sub down a few decibels late at night does more than anything you hang on the walls.

Sources for this step (6)
8
Step 8 of 9 · about an hour

Connect everything

Do this

  • Choose one hub: the receiver (sources into it, one cable to the TV) or the TV (sources into it, sound out to a soundbar).
  • Use the TV’s HDMI port labeled eARC for the receiver or soundbar, and turn on HDMI control (CEC) on both.
  • Give a game console an HDMI 2.1 port for 4K at 120 Hz, VRR and ALLM, and a certified Ultra High Speed HDMI cable.
  • Wire the streaming box to Ethernet if you can, and plug the gear into a surge protector (see network and power).
console direct: HDMI 1 or 2HDMI eARCGame console4K120, VRR · HDMI 2.1Streaming boxApple TV, Roku · HDMIUHD Blu-raylossless audio · HDMIAV receiverswitches · decodes · powersTVits eARC port7 speakers5.1.2: wire to each2 subwoofersone LFE cable each
Plug sources into the receiver; it switches, decodes and powers the speakers, and sends video to the TV. Connect its HDMI output to the TV’s eARC port so the TV’s own apps play through the speakers too. Solid lines run through the receiver; the dashed one is the console’s own cable to the TV.
With our TV pick, the TCL QM7L: its eARC port and a 4K120 consoleIts eARC port isn’t one of the two 4K120 ports (HDMI 1 and 2; RTINGS). That doesn’t matter for films and apps, which run at 4K and 60 Hz or less: the receiver goes on the eARC port as usual. A console that wants 4K120 goes straight into HDMI 1 or 2, as drawn; its sound reaches the receiver over eARC if the TV passes the console’s surround sound (check its manual). If it doesn’t, run the console into one of the receiver’s 4K120 inputs and the receiver into HDMI 1 or 2 instead. Then the TV’s own apps no longer play through your speakers, which doesn’t matter: the Apple TV in your plan plays them.

eARC carries the lossless formats (Dolby TrueHD and DTS-HD Master Audio, with Atmos and DTS:X, and multichannel PCM) where both ends support them. Plain ARC still carries Dolby Digital Plus, which is how streaming services deliver Atmos, but not the lossless tracks on a UHD Blu-ray.

Which device should be the hub

Route through whichever device supports everything your sources need. An older receiver that can’t pass 4K at 120 Hz is better fed by the TV over eARC, as long as the TV passes the audio formats you use.

Go deeper

Cables and HDMI control

For 4K120 and other HDMI 2.1 signals, buy a certified Ultra High Speed HDMI cable (it carries a scannable label); certification is per model and length, and “8K” on a marketplace listing is not certification. HDMI control (CEC) turns devices on together and passes volume, but brands implement it differently: if devices fight over inputs, connect them one at a time and turn off only the control functions you don’t want. Sony’s eARC checklist is a good general one: HDMI control on, ARC/eARC set to Auto, the labeled port, then add other devices back.

Cutting in ceiling speakers and fishing wire

Ceiling speakers. Find the joists first (a stud finder, then a small test hole) and mark the cutout with the template that comes with your speaker: sizes differ by model. Cut with a drywall saw, clear of lights, pipes, ducts and wiring; pull the wire through, then tighten the speaker’s swing-out clamps until it is snug against the drywall, not crushed (Totem). Some ceilings, such as fire-rated assemblies between apartments, need a listed back box: check the speaker’s listing and local code before you close up.

Fishing wire. Use in-wall-rated speaker cable (CL2 or CL3). Work from the attic or basement where you can; across a ceiling, run parallel to the joists, and where you must cross a solid joist, drill through its middle, at least 2 inches from its edges (Totem). Never drill a truss or an I-joist’s top or bottom flange; an I-joist’s web only where its maker’s hole chart allows. Seal any fireblock or top plate you pierce with fire-rated sealant. In walls, keep holes under 40% of the stud’s width and add a nail plate wherever the cable passes within 1¼ inches of the face (Crutchfield). Push fish tape or fiberglass rods through the cavity, tape the cable on and pull it back, going around insulation rather than through it; low-voltage brackets finish the openings.

Wiring and setting up the receiver

Speaker wire: red (+) to red, black (−) to black at both ends; one reversed speaker sounds thin and vague. Banana plugs make the connections tidy and repeatable. Subwoofer: one cable from the receiver’s Sub/LFE output to each sub’s LFE input. Set each sub’s own crossover knob to maximum or LFE/bypass, so the receiver does the bass management (SVS). Channels: tell the receiver what is connected in its speaker setup. A seven-channel receiver runs 5.1.2 by using its surround-back amplifiers for the two height speakers; a nine-channel one needs a stereo power amplifier on its pre-outs for 7.1.4 (the manual’s amp-assign page shows which). Phase, then calibrate: with one sub, set its phase to 0, then play an 80 Hz test tone through the front left and the sub together, try the sub’s phase at 0° and 180°, keep whichever is louder at your seat, and calibrate (step 9); if you change it later, rerun the correction. With two subs, set them as the table at the top of step 6 says instead: its tuning steps replace this check.

Streaming or disc?

A 4K Blu-ray carries several times the data of a 4K stream. These are measured examples, not averages for every title: the disc figures are three recent releases, the streams older published samples.

Picture, Mbps bars to 128
4K Blu-ray format ceiling (100 GB disc)128
Recent 4K Blu-rays, feature average79–85
Apple TV+ shows, measured 201926–29
Netflix top 4K encodes, 2020 study average8
Atmos sound, Mbps its own scale: bars to 5
Dolby TrueHD Atmos on disc (one title’s average)4.3
Netflix Atmos (Dolby Digital Plus)0.45–0.77
Blu-ray Disc Association; Blu-ray.com reviews (2024–2026); FlatpanelsHD (2019); Netflix (2019, 2020). Streaming rates adapt to your connection and change over time.

More data doesn’t always mean you’ll see or hear a difference: a good stream on a good connection looks excellent, and we found no controlled test showing every listener hears lossless Atmos. But discs don’t buffer, don’t leave the catalog, and carry the lossless track, so for the films you care most about a 4K Blu-ray player is the upgrade. Plain ARC can’t carry that lossless track; eARC can.

Sources for this step (17)
9
Step 9 of 9 · about an hour

Calibrate picture and sound

Do this

  • Picture: Filmmaker Mode for movies, Game mode for gaming, and motion smoothing off for film.
  • Sound: run room correction with the mic at your head on the main seat first, at ear height, pointing up.
  • Check what it set: crossovers near 80 Hz, distances, levels and the subwoofer.
  • Confirm it works: the Atmos badge on a known Atmos title, lip sync, one remote for volume.

Mic positions

Where the bass hands over

123456782 ft↑ screen ahead · main seat, close up 20501002005001k2k5k10k20k2 subsspeakers80 Hz crossoverLFE cutoff, 120 Hzfrequency, Hz
Mic at ear height, pointing up: position 1 at your head on the main seat, then up to seven more within about 2 ft, at least 20 inches from any wall. The second chart: where the bass hands over once correction has run. The crossover sends the speakers’ own deep bass to the sub below 80 Hz; the LFE cutoff at 120 Hz is a separate limit on the movie’s .1 effects channel.
Example roomSee this step in 3D
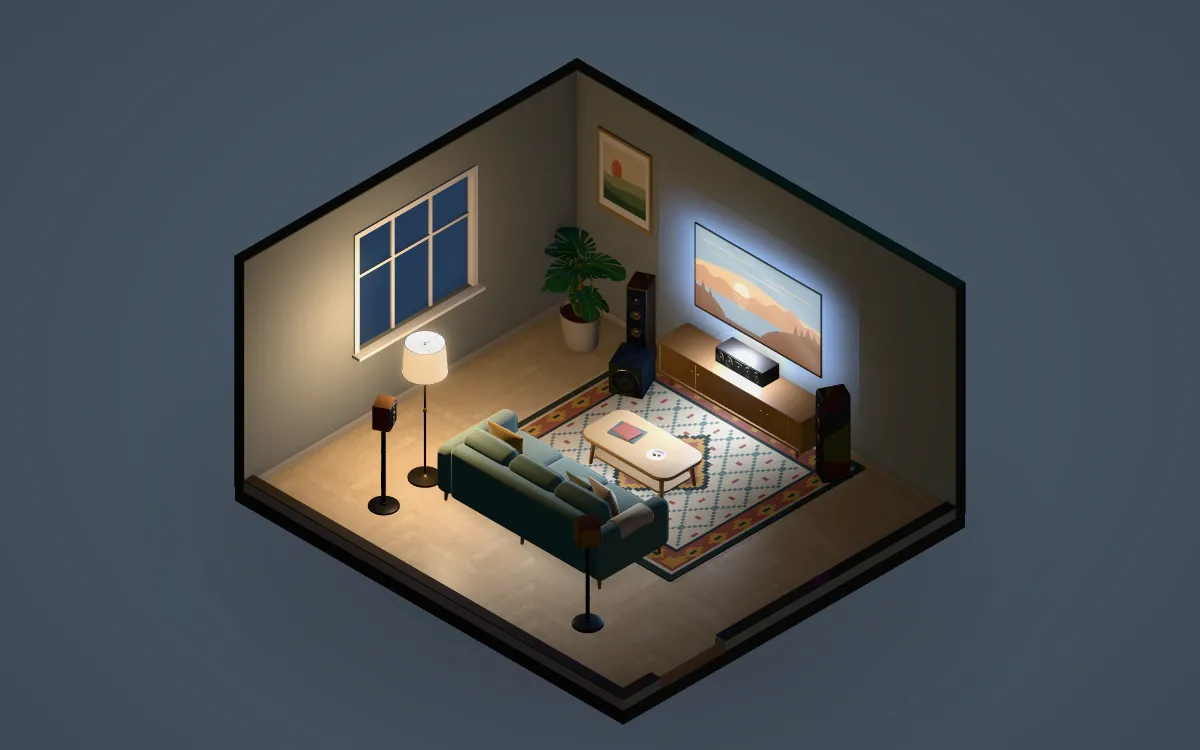
The finished room in the evening: TV, 5.1 speakers, subwoofer, rug and lamp.

Calibrated and ready for movie night: the example room in the evening, with a dim bias light behind the screen.

MoviesFilmmaker Mode (or Movie/Cinema)Motion smoothing, sharpening and noise reduction off
SportCinema or custom, brighter backlightLight motion smoothing is a fair preference
GamesGame mode + enhanced HDMI on that inputFor 4K120, VRR and auto low-latency
SpeakersCrossover 80 Hz (“small”)Higher for small speakers and up-firing modules
Room correctionMic at your head, main seat first6–8 positions within 2 ft, 20 in from walls (Audyssey)
Levels by hand75 dB SPL at the seat, C-weightedEach channel’s test noise (Anthem)
Why these settings

Picture. The UHD Alliance’s Filmmaker Mode switches off motion smoothing, sharpening and noise reduction so a film looks the way it was mastered; it is for movies and TV, not a required sports or gaming preset. For sports, a cinema or custom base with a brighter backlight and, if you like it, light motion smoothing is a fair preference. For gaming, use Game mode and turn on the input’s enhanced HDMI setting so 4K120, variable refresh rate and auto low-latency mode work. Leave local dimming on its movie-preset setting unless a review of your exact model says otherwise.

Sound. “Small” and “Large” on a receiver mean bass routing, not speaker size: set speakers to a crossover (THX-certified receivers must offer 80 Hz, a good start; higher for small speakers and up-firing modules) and the subwoofer handles everything below it. Leave the LFE low-pass at its default. Room correction measures from several positions, the main seat first: Denon’s Audyssey wants six to eight positions within about 2 ft of it, with the mic at ear height and at least 20 inches from walls; follow your own system’s pattern. If you set levels by hand, Anthem’s method is the classic one: each channel’s test noise at 75 dB SPL at the seat on a C-weighted meter.

Don’t chase reference level. Reference is a calibrated relationship between signal and loudness, not a volume to watch at. Calibrate correctly, then listen as loud as is comfortable, and don’t add 10 dB to the subwoofer by hand afterwards.
If your plan has Dirac

Dirac replaces Audyssey rather than running with it: Audyssey stays available as a separate preset to compare. You measure with Dirac’s app on a Windows or Mac computer on the same network as the receiver, using the plan’s UMIK-1 (download its own “_90deg” calibration file from miniDSP, and mount it on a boom stand pointing at the ceiling; the receiver’s Audyssey mic doesn’t work with Dirac). Start at the main seat, then follow the app’s pattern around it (Denon suggests its wide pattern for more than two people or two rows), choose Bass Control, calculate, and export the filter to one of the receiver’s slots. With each sub on its own sub output, Bass Control sets their delays and levels itself, so step 6’s hand tuning isn’t needed (Denon).

Go deeper

Past the presets, and measuring

Picture: Filmmaker Mode gets you most of the way. To check black and white levels, use genuine test patterns (a calibration disc, or the patterns in a calibration app) rather than another owner’s numbers: settings don’t transfer between panels, even of the same model. For games, use the console’s HDR calibration with the TV’s game mode; whether the TV should also tone-map (or use a mode such as HGiG) depends on the model, so follow its maker’s advice and don’t stack two tone mappings. A professional calibrator earns their fee for projectors, where the screen and room change everything, and for premium TVs in dedicated rooms. Sound: room correction works from its own microphone. To see what placement and correction actually did, a calibrated USB mic and the free Room EQ Wizard measure the bass at your seat: measure, move one thing, measure again, and look at 20–200 Hz, where rooms do the most damage. Our measurement pick is $79.

Sources for this step (7)
Around the system

Light, power, network, heat and quiet

What makes the system safe and pleasant to live with. Pick a letter on the plan.

a window behind you? shade itdim bias light behind the TVABCDEFGHI

Your room, 16 ft wide × 14 ft deep · TV wall at the top

  • TV and console
  • receiver
  • router
  • window
  • outlet, wall plate
  • air vent
  • door and its swing
  • glare: window → screen → eyes

Light and glare

D65neutral white for a bias light
5 cd/m²how bright the wall behind should look
  • Keep daylight and lamps off the screen: check reflections from every seat, by day and at night.
  • Blackout shades or lined curtains on the windows that reach the screen; cordless ones where children live or visit (CPSC).
  • A bias light, if you want one: dim, neutral white (D65, about 6500 K) on the wall behind the TV, so the wall glows at about 5 cd/m² (ITU BT.2100, SMPTE, Dolby). That is far dimmer than most strips ship. It is not “5 lux” and not “10% of the TV’s peak”.
  • Put movie lighting and cleaning lighting on separate scenes, keep a path light, and test dimmers at their lowest for buzz and flicker (RP22).

Sources: ITU-R, SMPTE, Dolby, CEDIA / CTA, US Consumer Product Safety Commission

2026 edition · prices checked Oct 6, 2026

What to buy this year

Picked from published specifications and independent measurements: we haven’t tested these hands-on, and no maker pays to be here. Prices are what the named US store showed on Oct 6, 2026 (TCL’s QM8L and X11L, KEF’s R Meta, HSU’s VTF-TN1 and Denon’s X6800H on Oct 7), including each TV at your size; the allowances in the systems (wire, stands, a riser) are our estimates. Specifications are the maker’s unless marked measured; the takes and “Know first” notes are our judgment.

When to buy: TVs are usually near their lowest prices of the year in November, around Black Friday, and last year’s models are cleared in late winter and spring as new ones arrive (RTINGS, Wirecutter). Buying before then? Ask about a holiday price guarantee.

Complete systems, by budget

Everything for a room like yours, priced from the picks below. The screen is sized to your seat; change the room at the top and these change with it.

Step-up 5.1.2 5.1.2

ELAC’s Debut 3.0 speakers (a matched family; these exact models aren’t independently measured), two subwoofers, two height speakers (Polk in-ceiling) and a streaming box: the system that holds its own for years.

about, before tax$4,889$111 left; the next step in this plan’s order, the 85-inch screen, costs about $300 more. Keep it, or spend it on the room (rug, curtains, blackout).

Screen 25%Speakers 29%Receiver 12%Subwoofers 14%Extras 21%Extras: streaming box, stands and brackets, wire and cables, measurement mic, acoustic panels, mount

All 14 items, priced
WhatOur pickPrice
Screen75-inch TCL QM7Lchecked price at this size, Oct 6, 2026$1,200
Front speakersELAC DB53 bookshelf (fronts)$399
CenterELAC DC53 center$349
SurroundsELAC DB53 bookshelf (surrounds)$399
HeightPolk RC80i in-ceiling$249
ReceiverDenon AVR-S770H$599
SubwooferRSL Speedwoofer 10E$339
Second subwooferRSL Speedwoofer 10E$339
Streaming boxApple TV 4K (128 GB, with Ethernet)$249
Stands and bracketsStands for the fronts, brackets for the surroundsour allowance$200
Wire and cablesSpeaker wire, HDMIour allowance$100
Measurement micminiDSP UMIK-1 + Room EQ Wizard$79
Acoustic panelsGIK FlexRange panel (formerly 242), 2 × 4 ft × 2$238
MountSANUS BXT7$150
Total$4,889

The picks

Three TCL Mini-LEDs from value to flagship, two OLEDs, and Sony’s RGB-LED on our watch list. Each card leads with the price at your screen size, or the nearest size the model comes in (its Specs list every size we checked); the systems above use the same checked prices.

EntryIn your plan

TCL QM7L2026

$1,199.9975-inch, your sizeat Best Buy

The most picture per dollar: a bright Mini-LED with real local dimming, in stock at Best Buy at every size from 55 to 98 inches.

Know first

Only HDMI 1 and 2 have full HDMI 2.1 bandwidth (4K at 144 Hz), and the eARC port isn’t one of them (RTINGS): with a receiver, put the receiver on the eARC port and a 4K120 console straight into HDMI 1 or 2 (step 8 has the details). Reflections stay visible in dark scenes, and its glossy screen reflects enough that bright lamps or windows facing it can leave a rainbow smear and a band of light (RTINGS); if you can’t control them, the matte S95H is the bright-room OLED. It replaced the 2025 QM7K, now sold out at most stores.

Specs
  • Sizes: 55″ $699.99 · 65″ $899.99 · 75″ $1,199.99 · 85″ $1,499.99 · 98″ $2,199.99
  • Mini-LED (VA LCD), 1,152 dimming zones at 65 in
  • 4 HDMI (2 × HDMI 2.1, 4K 144 Hz), eARC
  • 2,840 nits, 10% HDR window (AVS Forum, 75-inch, after TCL’s recommended black-screen warm-up)
Measured: tested the 65-inch; RTINGS says it applies to 55 to 98
Step-up

TCL QM8L (85QM8L)2026

$2,149.9985-inch, the nearest size we pricedat Best Buy (was $3,999.99)

The step above the QM7L at the big sizes: more dimming zones (3,200 at 85 in, 4,032 at 98), four full HDMI 2.1 ports, and PCMag measured about 4,000 nits on its 75-inch. The plans use it at 85 or 98 inches when the money left reaches it.

Know first

Nobody has published measurements of the 85- or 98-inch yet (PCMag and eCoustics tested the 75), and the two reviews’ brightness differs with picture mode. Its anti-reflection screen reduces glare but doesn’t remove it.

Specs
  • Sizes: 85″ $2,149.99 · 98″ $2,999.99
  • SQD Mini-LED; 3,200 zones at 85 in, 4,032 at 98 (TCL)
  • 4 × HDMI 2.1, 4K 144 Hz; eARC
  • 98 in was $5,999.99; prices checked at Best Buy, Oct 7
Measured: tested the 75-inch: 3,956 nits peak, 773 full screen (HDR10 Movie); eCoustics measured about 2,000 in Filmmaker
Premium

TCL X11L2026

$4,999.9985-inch, the nearest size we pricedat Best Buy

Our premium big screen for a bright room: TCL’s flagship. FlatpanelsHD measured the 98-inch (a European sample) at about 4,500 nits on a 10% window and 735 across the whole screen, with 20,736 dimming zones; the plans use it only at that size.

Know first

It still blooms around bright objects and loses contrast off to the side (FlatpanelsHD), and its anti-reflective screen isn’t matte: shade a window that faces it. The 10,000-nit headline is a brief boost, not what you’ll see. Tom’s Guide measured the 85-inch at 2,679 nits (10% window) in a different lab and mode, which can’t be set against the 98-inch’s result, so at 85 inches our plans stop at the QM8L.

Specs
  • Sizes: 85″ $4,999.99 · 98″ $7,639.99
  • SQD Mini-LED; 14,400 zones at 85 in, 20,736 at 98
  • 4 × HDMI 2.1, 4K 144 Hz; eARC
  • 85 in was $7,999.99, 98 in was $9,999.99 (Best Buy)
Measured: tested the 98-inch, June 2026: 4,472 nits (10% window), 735 full screen
Value OLED

LG C62026

$2,299.9977-inch, the nearest size we pricedat Best Buy

The OLED most rooms should buy: deep blacks and wide viewing angles for far less than the flagships, in every size from 55 to 83 inches. RTINGS calls it its best mid-range OLED.

Know first

The 77- and 83-inch models are a different variant, the C6H, which RTINGS reviews separately (rtings.com/tv/reviews/lg/c6h-oled); a review of one size doesn’t automatically cover the other.

Specs
  • Sizes: 55″ $1,299.99 · 65″ $1,499.99 · 77″ $2,299.99 · 83″ $3,499.99
  • OLED: C6 at 55–65 in, C6H at 77–83 in
  • 4 × full HDMI 2.1 (one eARC): 4K 120 with VRR for consoles, 165 Hz for PCs (What Hi-Fi, Expert Reviews)
  • Sold and stocked by Best Buy, Oct 6
Measured: tested the 65-inch C6 (applies to 55); the C6H review covers 77 and 83
High

Samsung S95H OLED2026

$3,699.9977-inch, the nearest size we pricedat Best Buy

Our bright-room OLED: a glare-free finish RTINGS rates superb at handling reflections, very wide viewing angles, and four full HDMI 2.1 ports (4K 120 for consoles, 165 Hz for PCs). In a dark room the LG C6 gives the same blacks for less.

Know first

RTINGS tested the 77-inch, which it says applies to the 55 and 65. The 83-inch ($5,499.99) is a different panel (RGB Tandem WOLED): Samsung lists it as Glare Free too, but no one has published measurements at that size, so our plans don’t use it.

Specs
  • Sizes: 55″ $1,999.99 · 65″ $2,499.99 · 77″ $3,699.99
  • QD-OLED, glare-free matte finish
  • 4 HDMI, all 4K at 165 Hz; eARC
  • 65-inch: 59.4 × 35.2 × 1.0 in without stand
  • 65-inch feet 43.1 in apart: check your console
Measured: tested the 77-inch (same panel family as the 65)

On our watch listSony BRAVIA 7 II$2,299.99 at 75 inchesSony’s 2026 RGB-LED LCD, in stock at every size from 50 to 98 inches, at about twice the TCL’s price at 65 inches and 2.7 to 4 times at 85 to 98. Our priced systems use the TCL; we’ll add the Sony once we can compare its measured brightness and dimming (RTINGS keeps scored results for members, for every TV this year).See price ↗RTINGS’s review ↗
How to budget, and why we don’t use a percentage rule

We looked for an authoritative split between screen, speakers and receiver and found none: the familiar “half on speakers” advice is for stereo hi-fi (Crutchfield). So the systems above are priced from real picks instead, with one guardrail of our own: the screen gets at most half the budget, so the sound is never starved (only the cheapest soundbar plan, or a room with no speaker wiring, may give the screen the rest). For the order of spending, ours is:

  1. The room and the people: seats, sightlines, light, neighbors and anyone with access needs.
  2. The enabling work: safe power, a solid mount, cable paths, ventilation and light control. Unsafe shortcuts aren’t savings.
  3. Screen and speakers together, so one doesn’t starve the other (the order the plans above follow is below).
  4. The receiver to suit them: channels, connections and the speakers’ load matter more than watts.
  5. The whole installed cost: mounts, wire, labor, delivery, tax, seating, shades and a contingency.

Within the equipment, every plan above spends in one order: a screen big enough for your seat first, then complete sound, then the biggest screen your seat suits, then better versions of everything.

For scale, CEDIA’s consumer guide puts professionally designed home theaters at roughly $1,000–7,000 for a budget system, $13,000–32,000 mid-range and $65,000 and up at the high end.

The 2026 edition

What changed this year

Five developments since 2024, and whether they should change what you buy.

  1. May 2025

    Wireless Atmos you place anywhere

    Dolby and TCL announced Atmos FlexConnect for TCL’s 2025 QM6K–QM8K TVs: up to four TCL Z100 speakers, tuned by the TV to wherever you put them.

    Worth a look if you can’t wire. TCL TV and TCL speakers only, for now.

    Dolby ↗
  2. Jun 2025

    HDMI 2.2 and Ultra96 cables

    The HDMI Forum released HDMI 2.2, up to 96 Gbps, with a new Ultra96 cable certification.

    Don’t wait for it. Nothing you watch needs it; a working HDMI 2.1 chain is fine.

    HDMI Licensing Administrator ↗
  3. Oct 2025

    Dirac ART on Denon and Marantz

    Active Room Treatment, which uses the other speakers to cancel bass problems, arrived on selected receivers (Denon’s X3800H and up): $299 on top of Dirac Live ($259–349 for the X3800H) and, with a subwoofer, Bass Control ($299), or $799 for all three in Dirac’s ART bundle (on sale from $947, Oct 6, 2026).

    Promising, not yet independently measured. Worth it in a difficult room once the sub is placed well.

    Dirac ↗
  4. Jan 2026

    RGB Mini-LED spreads to more sizes

    Backlights with separate red, green and blue LEDs spread from flagships to more sizes: Hisense announced 55–100-inch models; Sony’s BRAVIA 7 II uses RGB LEDs.

    Premium for now. Check reviews and stock: an announcement isn’t a shelf.

    Hisense USA ↗
  5. May 2026

    Auracast reaches surround sound

    Hisense became one of the first to send surround channels to speakers over Bluetooth LE Audio broadcast.

    Early days. No proof yet that brands work together.

    Bluetooth SIG ↗
Before movie night

The setup checklist

Tick as you go; it remembers on this device.

Setup checklist 0 / 18 done

Placement

0/4

Safety

0/4

Picture

0/3

Sound

0/4

Check it works

0/3
When it isn’t right

Troubleshooting

Pick the symptom. Note the original settings, change one thing at a time, and leave a factory reset for last.

No Atmos badge

UsuallyThe title, plan or app isn’t sending Atmos; the TV is converting the audio; or the source mixes in its own sounds.

  1. Confirm the title’s Atmos track is selected and your streaming plan includes it.
  2. Read the receiver’s or bar’s input-signal info, not an upmixer label: it should say Dolby Atmos.
  3. On a disc player, turn off secondary audio (BD audio mix), which forces a downmix (Sony).
  4. Set the source to bitstream where it needs to be; Apple TV sends Atmos its own way, so don’t force every source.
Back to Step 8: Connect everything →

Questions

What do I need for a basic home theater setup?

A screen sized for your seating distance and a good soundbar, with its subwoofer as the first thing to add (or a receiver with at least three speakers and a subwoofer), plus a streaming box or the TV’s own apps. Mount the screen with its center near seated eye height and run the room calibration; surrounds, overhead speakers and panels build on that.

What order should I set up a home theater in?

Layout first (which wall, where the seats go), then the screen size from your seating distance, then mounting height, then seating, speakers, subwoofer, room treatment, connections, and calibration last. Each step depends on the ones before it: speaker angles are measured from the seat, and calibration only works once everything is in its final place.

Is a soundbar or a receiver with speakers better?

A receiver with separate speakers sounds better and grows with you, but takes more space and wiring. With less than about $1,500 for sound, or where speakers won’t fit, a soundbar is the better choice; from about $1,500 (a $600 receiver, a $470 speaker set and a $340 subwoofer) separates win. Both benefit from a subwoofer placed by a crawl and from room calibration.

How far should the couch be from the TV?

Far enough that the screen fills about 30–40° of your view: roughly 1.2 to 1.6 times the diagonal. A 65-inch TV suits about 6 ft 6 in to 8 ft 10 in from your eyes; a 75-inch about 7 ft 6 in to 10 ft 2 in.

How high should the TV be mounted?

With the center of the picture near seated eye height, about 42 inches from the floor for a typical sofa. Higher is fine within about 15° above your eye line (THX); above a fireplace it usually is not.

Where should the subwoofer go?

Wherever the bass sounds most even at your seat, which you find with a subwoofer crawl: put the sub at your seat, play bass, crawl the room and listen for the smoothest spot, then put the sub there. Corners give the most output; in our 1,000-room study a single corner sub left the seats about 4.5 dB apart, against 3.7 dB at the middle of the front wall, but each seat a little smoother (7.3 against 7.9 dB): close to a toss-up, so crawl and compare. Two subwoofers can even out the bass across several seats: Harman’s research ranks the middle of opposite walls first in general. Step 6 places them for your room: the first layout in Harman’s order that fits, leaves a walkway, and scores at least as even as one sub in our model, counting a front sub that blocks the cabinet as about 1 dB worse.

Do I need acoustic panels?

Not to start. A rug, curtains and soft furniture do much of the work in a living room. Panels at the side-wall first-reflection points are the next step if dialogue sounds harsh or the stereo image is vague.

How much does a home theater cost?

With this year’s picks, at prices checked on Oct 6, 2026, for a typical 16 × 14 ft living room: about $1,500 for a 65-inch TV, a wall mount and a good soundbar; about $3,000 for a 75-inch TV with a receiver, five speakers and a subwoofer; about $7,600 for 5.1.4 Atmos with two subwoofers, Dirac room correction and an 85-inch TV; and about $11,700 for an 85-inch TV with KEF’s coaxial speakers and two subwoofers. At $25,000 it reaches an 83-inch OLED with two subwoofers and KEF’s R Meta speakers. Theater seats are extra: tell the room form you’re buying them and the plans price recliners for your row alongside. CEDIA puts professionally designed systems at $1,000–7,000 for a budget system, $13,000–32,000 mid-range and $65,000 and up at the high end. The form at the top of this page prices a system for your room.

Can I run the TV’s power cord inside the wall?

No. A TV power cord, extension cord or power-strip lead must not run inside a wall or through the hole beside the HDMI cable (NFPA, ESFI). Have an electrician add an outlet behind the TV, or fit an in-wall power kit listed for that use. Low-voltage cables can go in the wall: HDMI, and speaker wire marked CL2 or CL3.

What internet speed do I need for 4K streaming?

Netflix recommends 15 Mbps or more for 4K; Disney+ and HBO Max ask 25 Mbps (HBO Max recommends 50), as does Apple for 4K films bought or rented in its TV app. Measure at the TV or streaming box on a busy evening rather than on a phone beside the router, and wire the box to Ethernet if you can.

How much space does a recliner need behind it?

It depends on the model: about 4 inches for wall-hugger designs, a foot or more for others (we found 4, about 7 and 12 inches on three current models). Check the chair’s own specification, and its fully reclined length for the walkway in front.

What are the most common home theater setup mistakes?

Mounting the TV too high; trusting a VESA match to make a wall safe; running the TV’s power cord inside the wall; pushing the sofa against the back wall; putting 5.1 surrounds behind you instead of beside you; leaving a center speaker recessed in a shelf; parking the subwoofer in a corner without trying other spots; leaving motion smoothing on for films; and skipping room correction, then turning the sub up by hand. Each step above shows the fix.

Should I hire a professional?

For some parts, yes. An electrician for an outlet behind the TV or anything inside the wall that carries mains power; an installer for masonry, metal studs, very large TVs or a mount over a fireplace; a CEDIA integrator for a dedicated room with construction, wiring and control; and a calibrator for a projector or a premium TV in a dark room. Placing speakers, the subwoofer crawl and room correction are well within reach on your own.

What is eARC and do I need it?

eARC is the HDMI connection that sends sound from the TV to a soundbar or receiver. It carries lossless formats such as Dolby TrueHD with Atmos, where plain ARC is limited to compressed formats (which can still include streaming Atmos). Use the TV port labeled eARC and turn on HDMI control.

Sources

Standards, manufacturers’ manuals and published measurements, checked in October 2026; each step lists its own. Picks are chosen from published specifications and independent measurements; we have not tested them hands-on, and no maker pays for inclusion.

All 144 sources, by kind

Government 7

  1. US Access Board. ADA Standards, Chapter 3: turning space, reach ranges, operable parts.Government
  2. US Consumer Product Safety Commission. Anchor It!: TV and furniture tip-over prevention.Government
  3. US Consumer Product Safety Commission (2024). CPSC reminds families to tackle the deadly hazard of TV and furniture tip-overs (release 24-115).Government
  4. US Consumer Product Safety Commission. Clothing Storage Units (STURDY Act rule, 16 CFR 1261).Government
  5. US Consumer Product Safety Commission. Go cordless: window covering safety.Government
  6. US Consumer Product Safety Commission. Button cell and coin battery information center.Government
  7. US Consumer Product Safety Commission (2023). ASTM F1542 task group on recliner entrapment: meeting log.Government

Manufacturers 65

  1. Dolby Laboratories (2018). Dolby Atmos Home Theater Installation Guidelines, r3.1.Manufacturer
  2. Dolby Laboratories. Home Theater Speaker Guide: 5.1 and 5.1.2 setup sheets.Manufacturer
  3. Samsung US Support. Where to mount the TV.Manufacturer
  4. Sony Electronics Support (2025). Recommended viewing distance for watching TV.Manufacturer
  5. Denon. AVR-X3800H owner’s manual: crossovers, low-pass filter and Audyssey setup.Manufacturer
  6. Anthem. MRX/AVM manual §5.4: level calibration.Manufacturer
  7. Sony. No sound from ARC/eARC: troubleshooting.Manufacturer
  8. Sony. Dolby Atmos doesn’t play from a Blu-ray player.Manufacturer
  9. Samsung (2025). HW-Q990F / Q930F / Q800F user manual.Manufacturer
  10. Bose (2026). Soundbar placement: Lifestyle Ultra Soundbar.Manufacturer
  11. Sony Electronics (2025). BRAVIA Theatre Bar 9/8 help guide (installation).Manufacturer
  12. SANUS. VLF728 full-motion mount: installation manual.Manufacturer
  13. SANUS. SSMK1 steel-stud mounting kit: instructions.Manufacturer
  14. Peerless-AV. DS-VW650 assembly instructions: masonry anchoring.Manufacturer
  15. Peerless-AV. A6X4 mount datasheet.Manufacturer
  16. Genelec (2022). Not enough bass: do I have a back-wall cancellation?.Manufacturer
  17. KEF (2025). To toe-in or not to toe-in.Manufacturer
  18. KEF. R11 Meta specifications.Manufacturer
  19. KEF. A guide to impedance.Manufacturer
  20. SVS. The Art of Subwoofer Placement.Manufacturer
  21. Denon. How much ventilation does my receiver need?.Manufacturer
  22. Yamaha. RX-A4A/A6A/A8A safety brochure.Manufacturer
  23. Sony. STR-AN1000 operating instructions: placement.Manufacturer
  24. Epson. Pro Cinema LS12000 user’s guide.Manufacturer
  25. Dolby (2025). How to set up your bias light for Dolby Vision content creation.Manufacturer
  26. Sony. HDMI-CEC (BRAVIA Sync) help.Manufacturer
  27. Logitech. Harmony remote support notice (legacy models).Manufacturer
  28. Klipsch. Thumping or humming noise from the subwoofer.Manufacturer
  29. Denon. AVR-S760H manual: Dialog Enhancer.Manufacturer
  30. Denon. AVR-X3800H manual: Audio Delay.Manufacturer
  31. Denon. AVR-S770H manual: no picture.Manufacturer
  32. LG. TV accessibility features.Manufacturer
  33. Samsung. TV and audio accessibility.Manufacturer
  34. Starkey (2025). Starkey partners with LG on Auracast TV accessibility.Manufacturer
  35. Ashley. Nerviano manual recliner (1080329).Manufacturer
  36. La-Z-Boy. Finley wall recliner (016747).Manufacturer
  37. Ashley. Valeview manual recliner (5320425).Manufacturer
  38. Netflix. Internet connection speed recommendations.Manufacturer
  39. Disney+. Recommended internet speeds.Manufacturer
  40. Apple. High-quality video formats on Apple TV.Manufacturer
  41. HBO Max. Watch in 4K Ultra HD.Manufacturer
  42. Apple. Wi-Fi and Ethernet specifications for Apple devices.Manufacturer
  43. Primacoustic (2023). How much acoustic treatment do I need?.Manufacturer
  44. Primacoustic (2023). Acoustic panel placement: the mirror trick.Manufacturer
  45. GIK Acoustics (2026). How thick should acoustic panels be?.Manufacturer
  46. SVS. Center Channel Speaker Placement Tips.Manufacturer
  47. SVS (2020). Subwoofer calibration and tuning: getting the bass just right.Manufacturer
  48. KEF. Subwoofer Setup Tips For Apartment Living.Manufacturer
  49. BenQ (2024). What is a good throw ratio and why does it matter?.Manufacturer
  50. Epson. Home Cinema projector user’s guide (screen size and projection distance tables).Manufacturer
  51. Stewart Filmscreen. What is the half-gain angle?.Manufacturer
  52. Screen Innovations. Short-throw / ambient-light-rejecting screen materials.Manufacturer
  53. Netflix (2019). Bringing studio-quality sound to Netflix.Manufacturer
  54. Dolby (2023). What is Dolby Digital Plus JOC?.Manufacturer
  55. Dolby. Dolby TrueHD.Manufacturer
  56. Dolby (2025). TCL brings Dolby Atmos FlexConnect to 2025 QD-Mini LED TVs.Manufacturer
  57. Dirac (2025). Dirac ART available for Denon and Marantz.Manufacturer
  58. Dirac. Dirac Live pricing.Manufacturer
  59. Hisense USA (2026). Hisense pioneers the evolution of RGB MiniLED at CES 2026.Manufacturer
  60. Dirac (2026). Dirac Live for Denon AVR-X3800H.Manufacturer
  61. Denon. AVR-X3800H: connecting 11.1-channel speakers.Manufacturer
  62. Totem Acoustic (2024). A guide to running and fishing wires for in-ceiling and in-wall speakers.Manufacturer
  63. XGIMI (2026). How to place a center channel speaker with a UST projector.Manufacturer
  64. Octane Seating. Riser platform and Flex HR riser series: dimensions.Manufacturer

Measurements 18

  1. RTINGS.com. TV viewing angle test.Measurement
  2. RTINGS.com. Reflections test: total reflected light and direct reflections.Measurement
  3. Blu-ray.com (2024). Land of the Dead 4K Blu-ray review (bitrates).Measurement
  4. Blu-ray.com (2025). The Place Beyond the Pines 4K Blu-ray review (bitrates).Measurement
  5. Blu-ray.com (2026). Hail, Caesar! 4K Blu-ray review (bitrates).Measurement
  6. FlatpanelsHD (2019). Apple TV+ 4K bitrate measurements.Measurement
  7. Audioholics (2023). Monoprice Monolith M2100X/M3100X/M5100X amplifier review.Measurement
  8. RTINGS (2026). TCL QM7L review.Measurement
  9. AVS Forum (2026). TCL 75-inch QM7L review.Measurement
  10. RTINGS (2026). LG C6H OLED review.Measurement
  11. FlatpanelsHD (2026). TCL X11L (SQD-miniLED) review.Measurement
  12. Tom’s Guide (2026). TCL X11L SQD-Mini LED TV review.Measurement
  13. PCMag (2026). TCL 75QM8L review.Measurement
  14. eCoustics (2026). TCL QM8L TV review (2026).Measurement
  15. Audio Science Review (2024). KEF R11 Meta tower speaker review.Measurement
  16. Audio Science Review (member Nuyes) (2023). KEF R6 Meta measurements and review.Measurement
  17. Erin’s Audio Corner (2023). KEF R3 Meta review.Measurement
  18. Audioholics (2024). HSU VTF-TN1 subwoofer review.Measurement

Professional guides 21

  1. THX. Viewing Guide FAQ.Professional guide
  2. International Union of Cinemas (UNIC) (2021). UNIC Cinema Technology Handbook (v2).Professional guide
  3. UHD Alliance. Filmmaker Mode: frequently asked questions.Professional guide
  4. HDMI Licensing Administrator. HDMI gaming features: VRR, ALLM, QMS.Professional guide
  5. HDMI Licensing Administrator. Enhanced Audio Return Channel (eARC).Professional guide
  6. HDMI Licensing Administrator. Ultra High Speed HDMI Cable certification.Professional guide
  7. HDMI Licensing Administrator. Installing long HDMI runs: active and optical cables.Professional guide
  8. THX. THX Certified AV receivers: bass management.Professional guide
  9. UL (2019). Wire and Cable Marking and Application Guide.Professional guide
  10. Bluetooth SIG. Auracast broadcast audio FAQ.Professional guide
  11. NFPA (2024). Electrical and fire safety at home: cords and power taps.Professional guide
  12. Electrical Safety Foundation International. Use extension cords properly.Professional guide
  13. Electrical Safety Foundation International. Surge protection: keeping your electronics and home safe.Professional guide
  14. CEDIA. Home theater costs.Professional guide
  15. Blu-ray Disc Association (2017). Ultra HD Blu-ray benefits: bitrate and capacity.Professional guide
  16. Bluetooth SIG (2026). Auracast broadcast audio transforms the home theater experience.Professional guide
  17. Crutchfield. How to hide the wires for your speakers and TVs.Professional guide
  18. RTINGS (2026). When is the best time to buy a TV?.Professional guide
  19. Wirecutter (2026). The best time to buy a TV.Professional guide
  20. What Hi-Fi? (2026). LG C6 (OLED65C6) review.Professional guide
  21. Expert Reviews (2026). LG C6 OLED review.Professional guide

Rules of thumb 2

  1. Crutchfield. Speaker wire: gauge and length.Rule of thumb
  2. Crutchfield. The budget audiophile playbook.Rule of thumb

Measurements and reviews behind the picks 17

  1. RTINGS. Sony BRAVIA 7 II (K65XR70M2).Measurement
  2. RTINGS. LG C6 (OLED65C6PUA).Measurement
  3. RTINGS. Samsung S95H OLED (QN65S95HAFXZA).Measurement
  4. ProjectorCentral. BenQ W2720i + Silver Ticket 120″ screen.Measurement
  5. ProjectorCentral. Hisense PX3-PRO + 110″ Daylight ALR screen.Measurement
  6. ProjectorCentral. Epson Pro Cinema LS12000 + Silver Ticket 120″.Measurement
  7. Sound & Vision. Sonos Beam (Gen 2).Measurement
  8. RTINGS. Samsung HW-Q800F.Measurement
  9. RTINGS. Samsung HW-Q990F.Measurement
  10. Audio Science Review. Denon AVR-X3800H.Measurement
  11. Erin’s Audio Corner. Polk Monitor XT.Measurement
  12. Erin’s Audio Corner. ELAC Debut 3.0.Measurement
  13. Erin’s Audio Corner (via Spinorama). Polk Reserve.Measurement
  14. Erin’s Audio Corner. KEF Q Meta.Measurement
  15. Audio Science Review. Polk RC80i in-ceiling.Measurement
  16. Audioholics. RSL Speedwoofer 10E.Measurement
  17. Audioholics. SVS SB-1000 Pro.Measurement